デザイナー機能でもエディター機能でも、サイトを公開すると、ファイルやサーバーの管理、バージョンの上書きといった面倒な作業をすることなく、すべての変更が即座にウェブに反映されます。
このレッスンでは、次のことを学びます。
- サイトを公開する方法
- 個々のコレクションアイテムを公開する方法
- サイトの公開を解除する方法
- ウェブフローステージングサブドメインをテストとフィードバックのために使用する方法
- 高度なパブリッシングオプション
1. サイトの公開方法
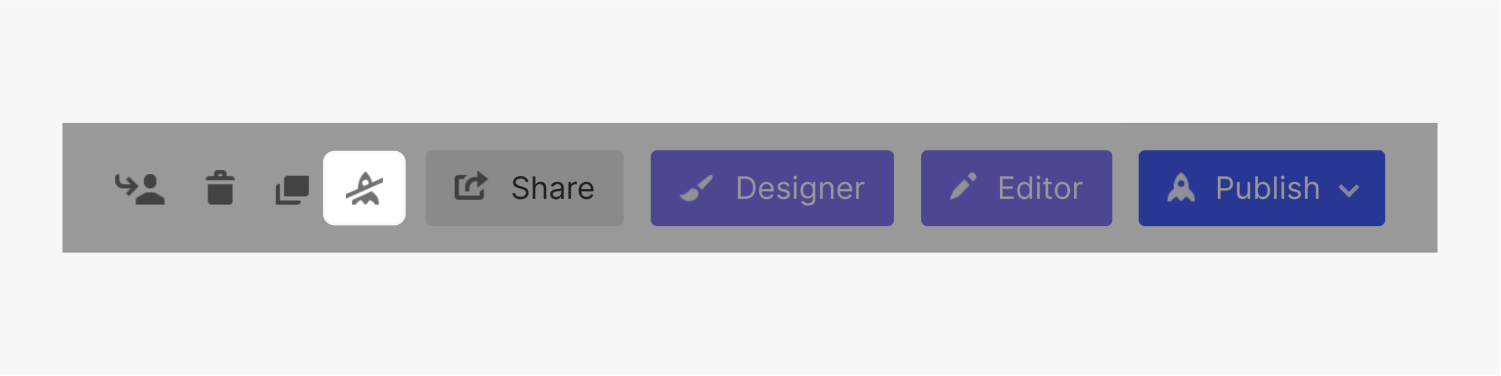
デザイナー機能、エディター機能、またはサイトセッティングから、すべてのサイトの変更と更新を公開することができます。
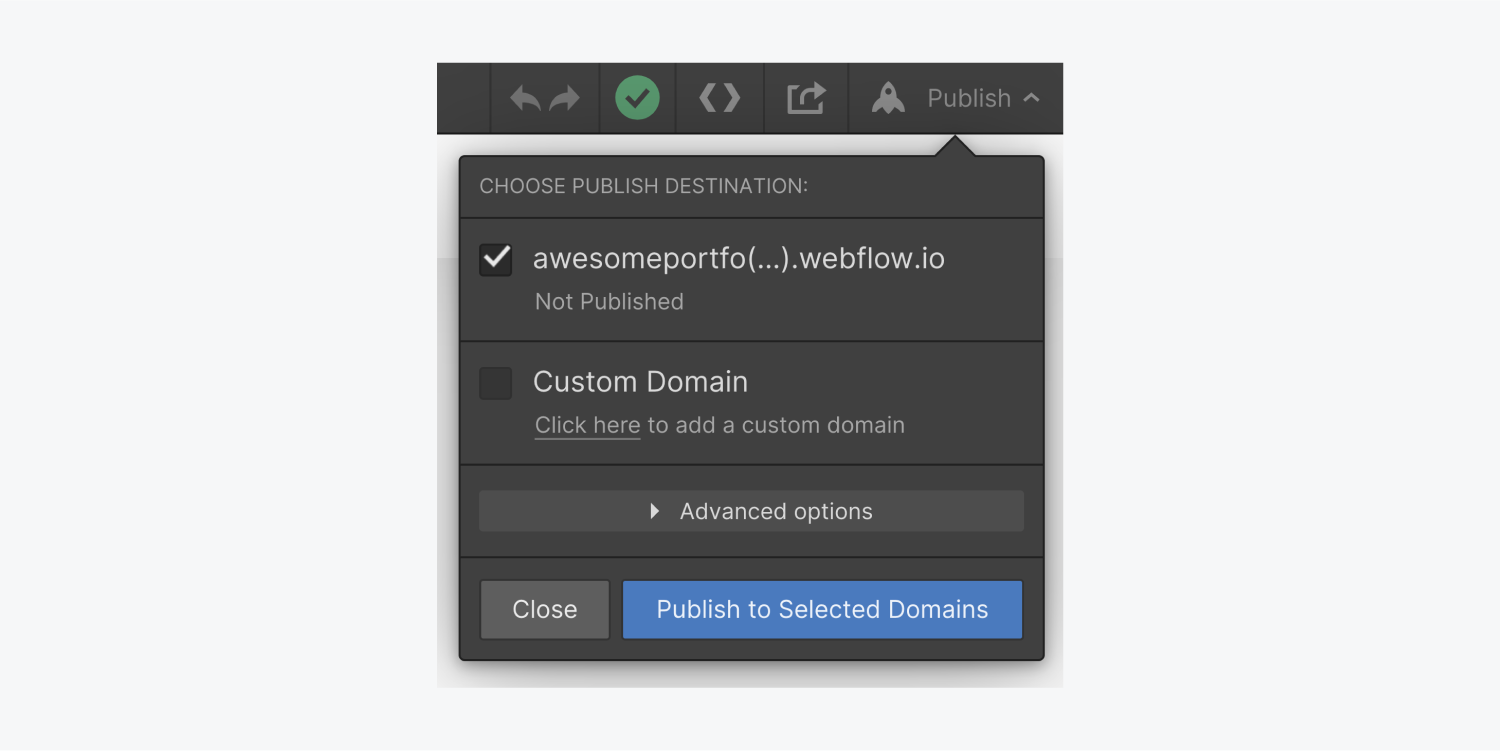
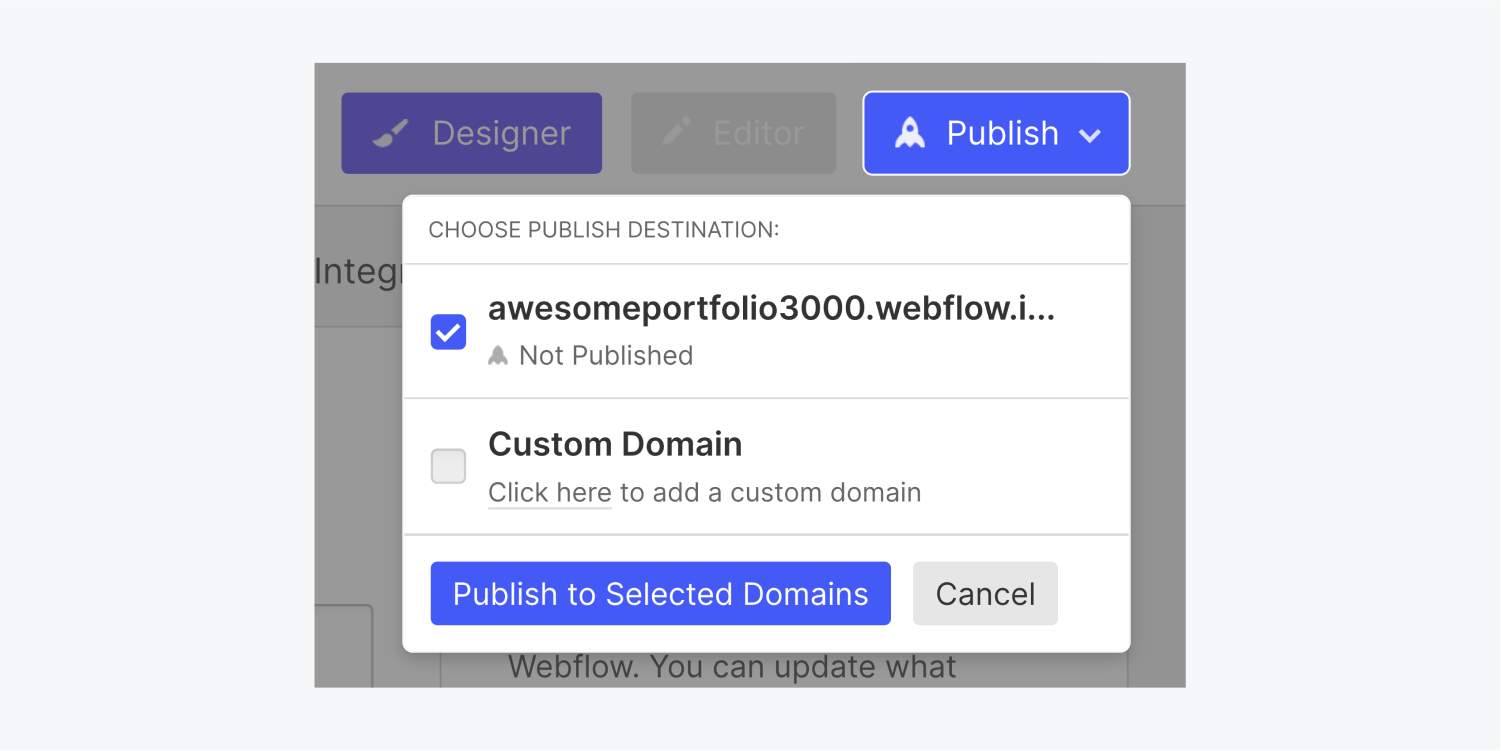
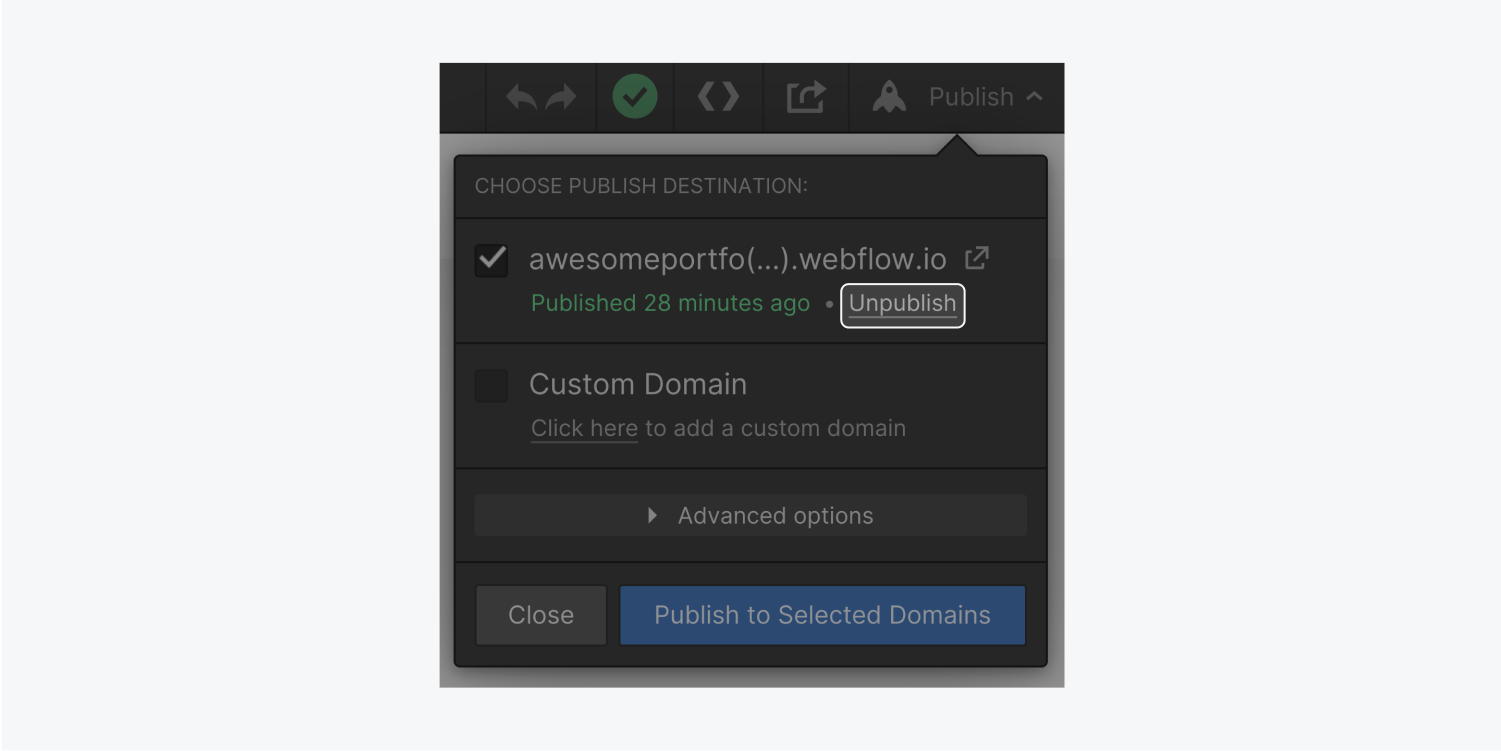
デザイナー機能またはサイトセッティングからの公開
- [公開]をクリックします。
- 公開先のドメインにチェックを入れます。
- [選択したドメインに公開する]をクリックします。
2. エディター機能からの公開
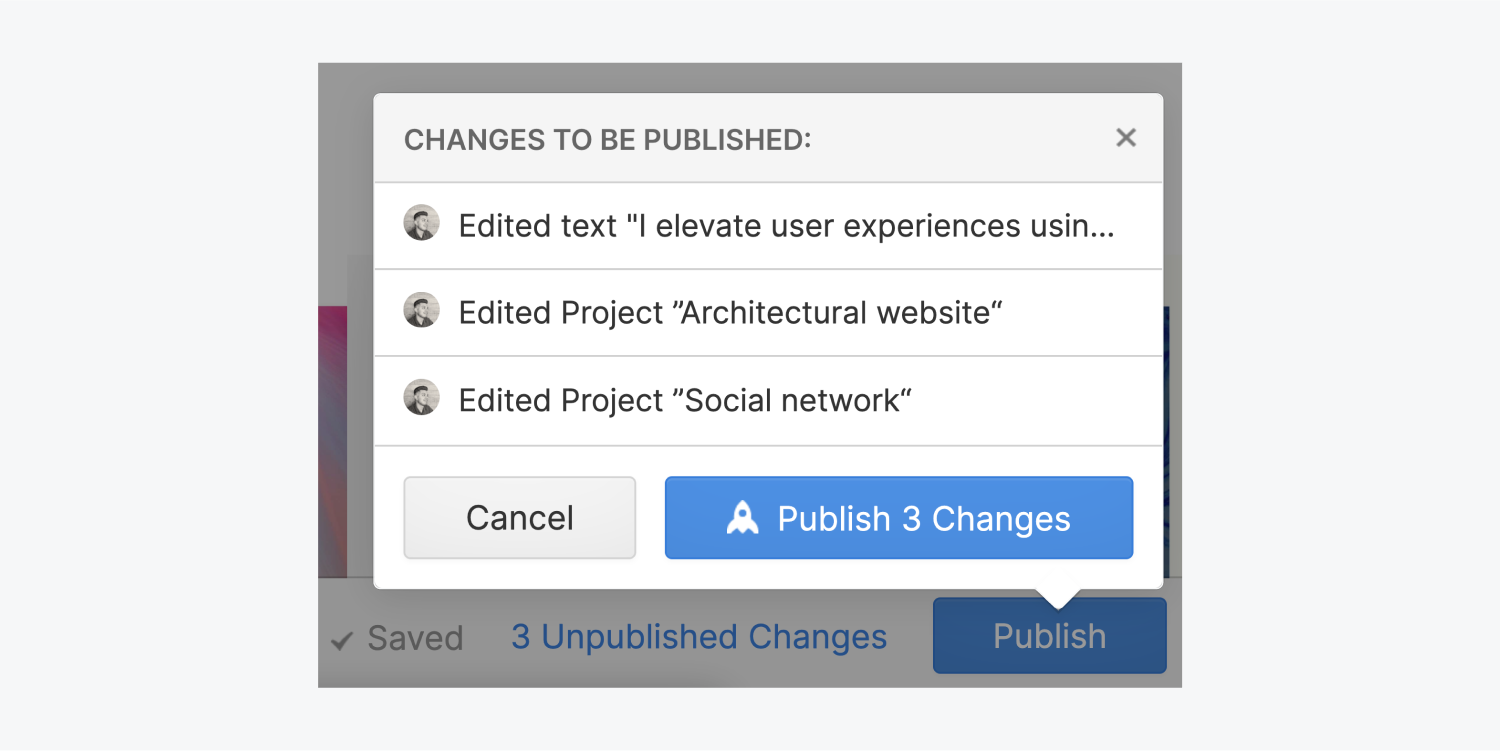
エディター機能で行った変更を公開すると、デザイナー機能で行った変更もウェブにプッシュされます。
エディター機能からサイト全体を公開するには
- パブリッシュをクリックすると、変更内容の概要が表示されます。
- [変更を公開]をクリックすると、すべての変更と更新が公開されます。
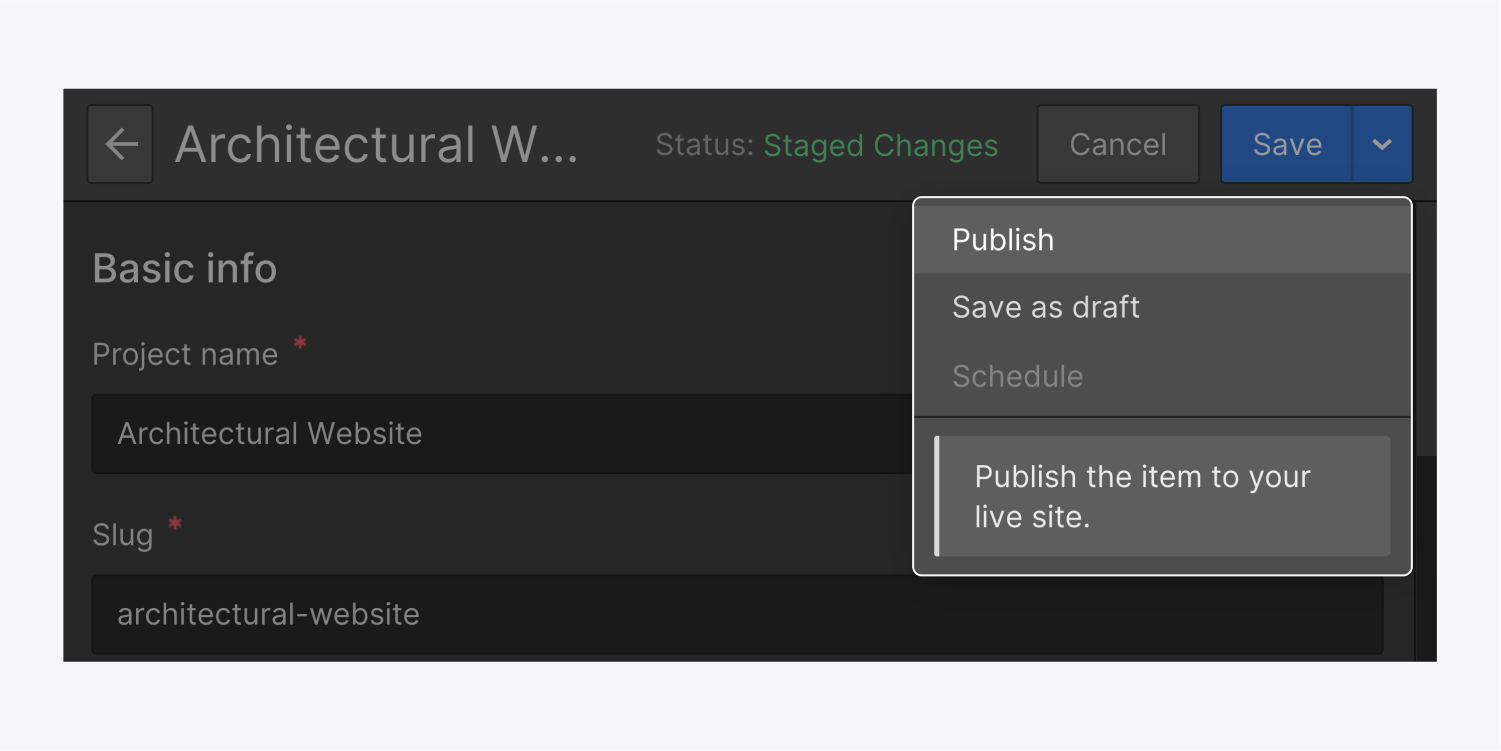
2. コレクションアイテムを個別に公開する方法
サイト全体を公開せずに 1 つのコレクション アイテムを公開または更新する場合は、アイテムの作成、編集、または保存後に [公開] を選択します。
3. サイトの公開を解除する方法
デザイナーまたはサイト設定から、一部または全部のドメインからサイトの公開を解除することができます。公開を解除するとすぐに動作しますが、ドメインをチェックして再度公開することで、いつでも再公開できます。
すべてのドメインとサブドメインからサイトの公開をすばやく解除するには、サイト設定の[公開解除]アイコンをクリックします。
1つのドメインからサイトの公開を解除するには
- デザイナー機能でサイトを開くか、サイト設定(Site settings)に移動します。
- [公開]をクリックします。
- サイトの公開を解除するドメインの横にある[公開解除]をクリックします。

4.ウェブフローのサブドメインをテストやフィードバックに使用する方法
カスタムコードのテストやサイトデザインのフィードバックや承認を得るために、Webflow staging subdomain (例: yoursite.webflow.io) にサイトを公開することができます - その際、カスタムドメインに変更を反映させる必要はありません。
カスタムドメインに公開せずにステージングサブドメインに公開するには
- デザイナー機能でサイトを開くか、[サイト設定]に進みます。
- [公開]をクリックします。
- Webflow staging subdomain(例:yoursite.webflow.io)をチェックします。
- カスタムドメインのチェックを外す
- Publish(公開)をクリックしてドメインを選択します。
重要:エディタから公開する場合、サイトはwebflow.ioステージングサブドメインとカスタムドメイン(複数可)の両方に公開されます。
サブドメインは、[サイト設定] > [一般]タブで指定することができます。

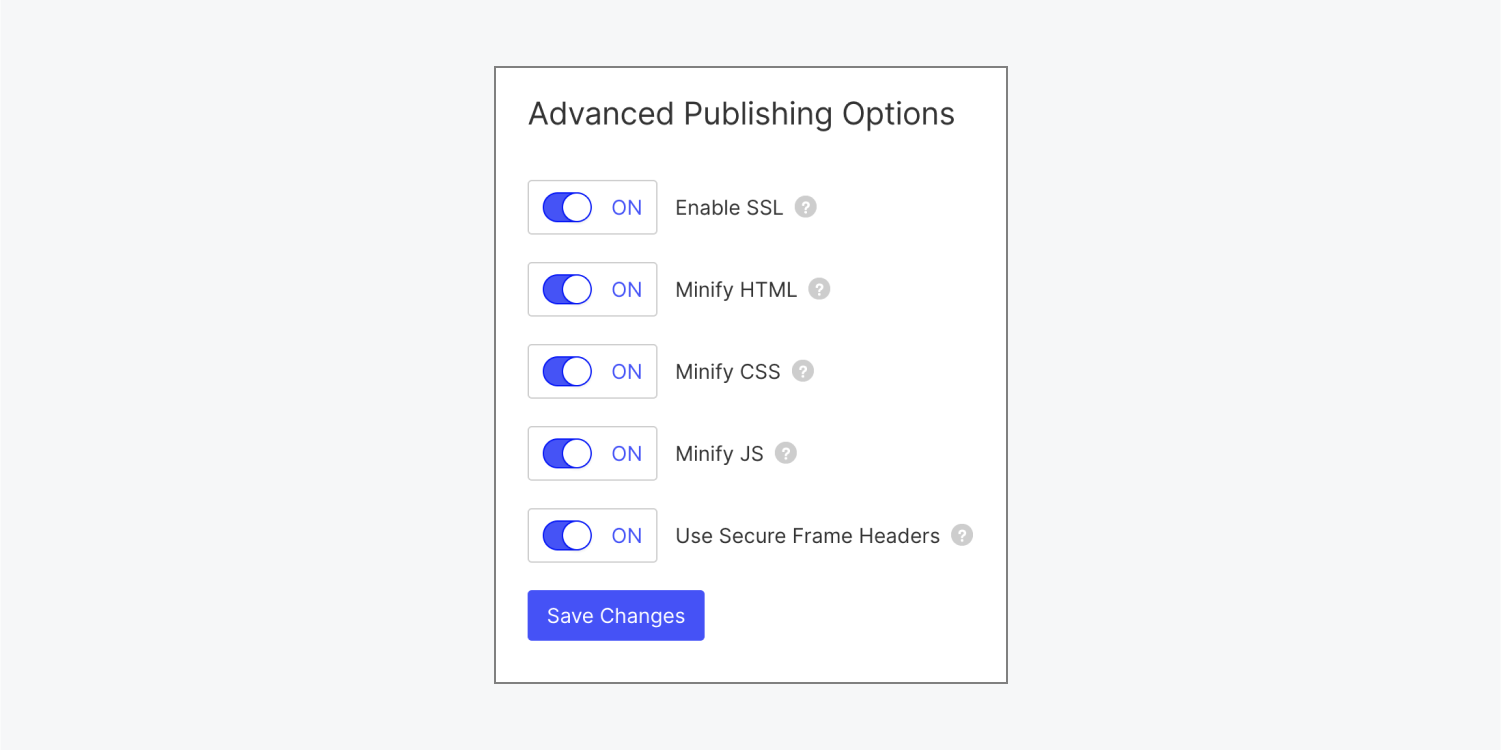
5. 高度なパブリッシングオプション
高度なパブリッシングオプションは、Designerのパブリッシングドロップダウン、またはSite settings > Publishing tab > Advanced publishing optionsにあります。
これらのオプションにより、SSLの有効化/無効化、HTML、CSS、JSの最小化、セキュアフレームヘッダーの使用を選択し、サイトの埋め込み場所を制限することができます。